The eBay Connector supports OAuth2.0 Client credentials and Code Flow Grant Type authentication. When creating a Connector, you must first store the authorization information in an Authorization Vault, which provides a secure storage location for API keys, tokens, headers, and other info used to authorize calls to external Web Services. In order for a Cloud Connector to work, this vault entry must exist and be configured for the external application you wish to communicate with.
Steps
Follow the below steps to create a new vault entry.
-
From the CIC Studio, go to File>New>Cloud Connector. This opens the Select Vault Entry screen.
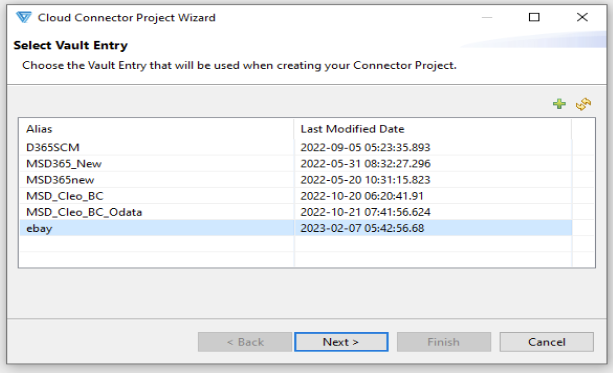
- Click the + button to create a new vault entry. Alternatively, you can select an existing vault alias from the list.
- Provide the vault entry alias name and select the environment and hit Next.
-
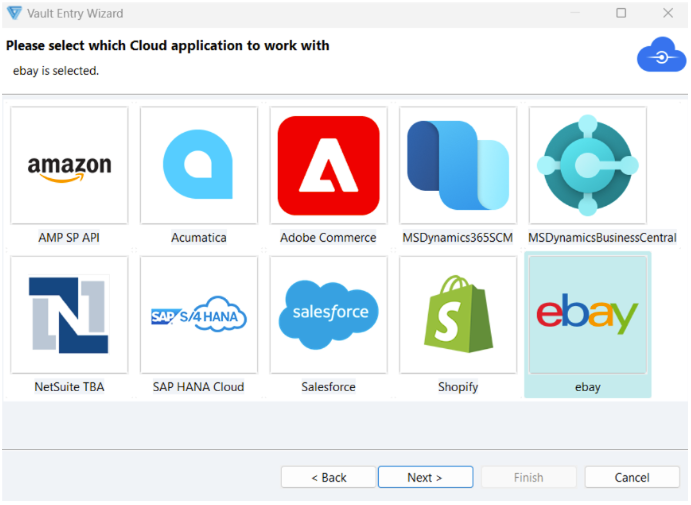
Select eBay from the list and hit Next.
-
Enter the authentication details.
-
Environment: Select between Sandbox and Production application environment based on the requirement. If a sandbox environment is to be created for testing purposes, then refer to the steps to create a sandbox account.
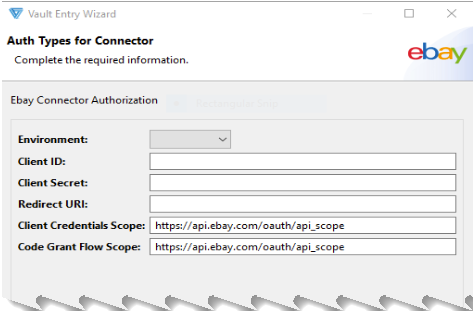
- Enter the client id, client secret, and Redirect URI of Sandbox or Production environment as per requirement. Please refer to OAuth Scopes to identify the required scopes. Add the required client credentials and code grant flow scopes to the respective section on the above page. Each scope for both client credentials and code grant flow must be separated by a space Once the credentials are entered, click Next.
Note: Each scope must be separated by a space.
-
-
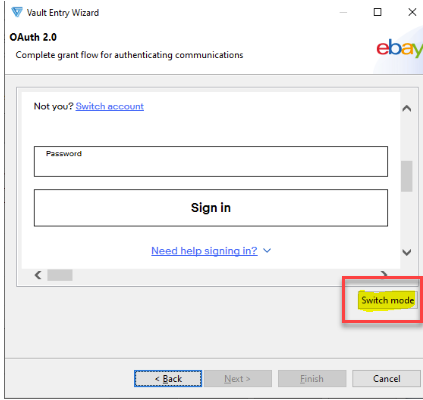
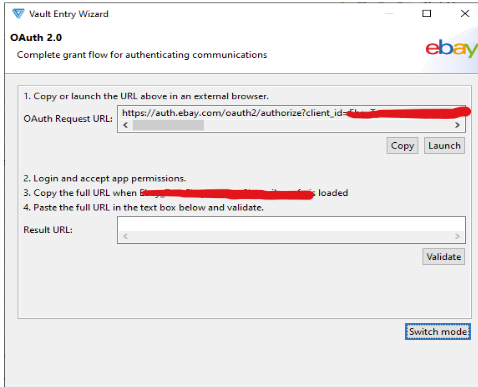
Click Switch Mode as shown below and follow these steps (OR) if the number of code grant flow scopes added in the previous step is less than 16, then login with your eBay credentials and proceed to Step 7.
-
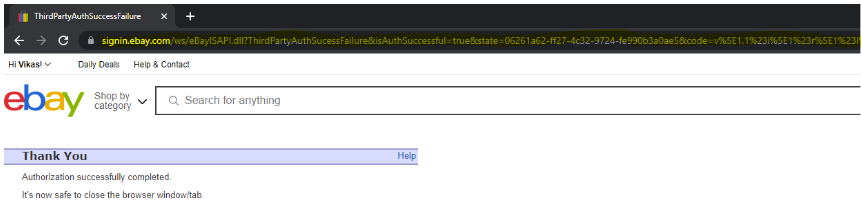
Copy the OAuth Request URL and paste it into any browser (incognito mode); this should prompt for a username and password.
- Enter the username and password.
-
Once the login is successful, copy the URL of the page you are redirected to as shown in the example above and paste the same in the Result URL section in the CIC application as shown below. Click Validate.
-
After pasting the URL into the Result URL section, click Next to proceed.
-
- Click Finish to finalize the creation of the vault entry.
Comments
0 comments
Please sign in to leave a comment.