
Issue:
How to configure Workspaces in Clarify Studio and how to change the color of the tabs for each environment?
Resolution:
Configuring Workspaces in Clarify Studio
Set Up Workspace Directories
A workspace is a folder where resources are stored. We recommend having at least three different workspaces: DEV, QA, PROD.
1. Create Workspace Directories for the company.
a. First, create a folder with the company`s name or locate the directory where you are already saving your work.
b. Then, create a DEV folder, a QA folder, and a PROD folder within the company’s folder. These folders should be located preferable in a mapped network drive and accessible by everybody that will be using Clarify. Each of these folders will be a separate Workspace in Clarify (i.e. C:\ABC Company\DEV)
Configure your DEV Workspace
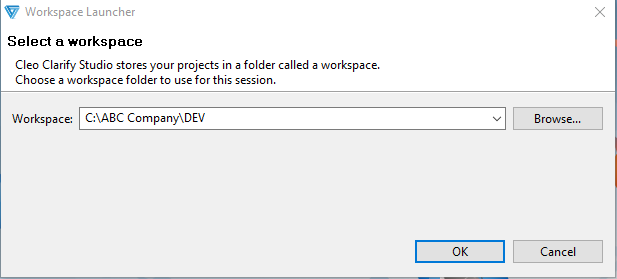
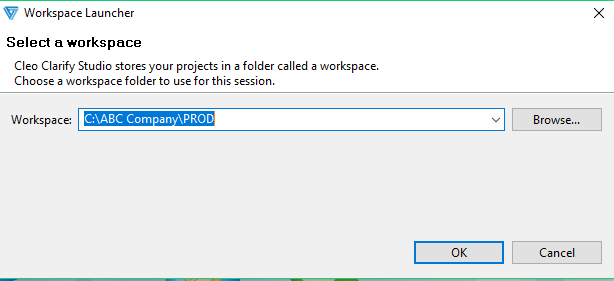
1. Open Clarify Studio and browse to the DEV Workspace directory. Click OK.
2. In the CLARIFY 4 Studio, Select Window >>> Preferences. Browse to General >>> Appearance >>> Colors and Fonts. Then, Browse to View and Editor Folders.
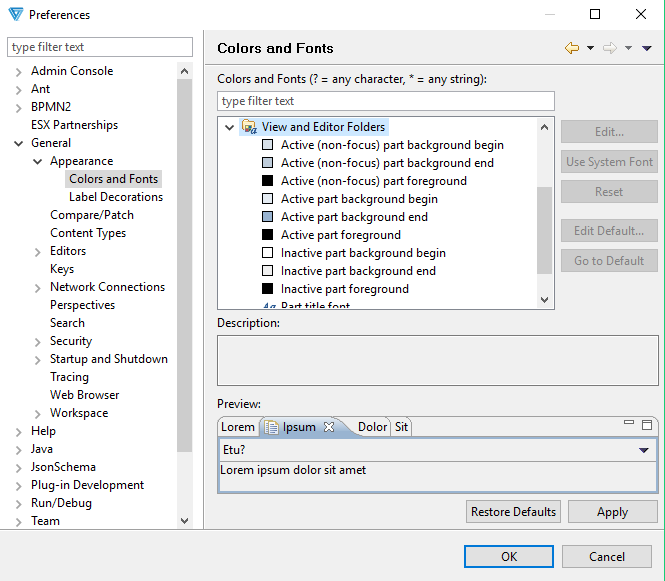
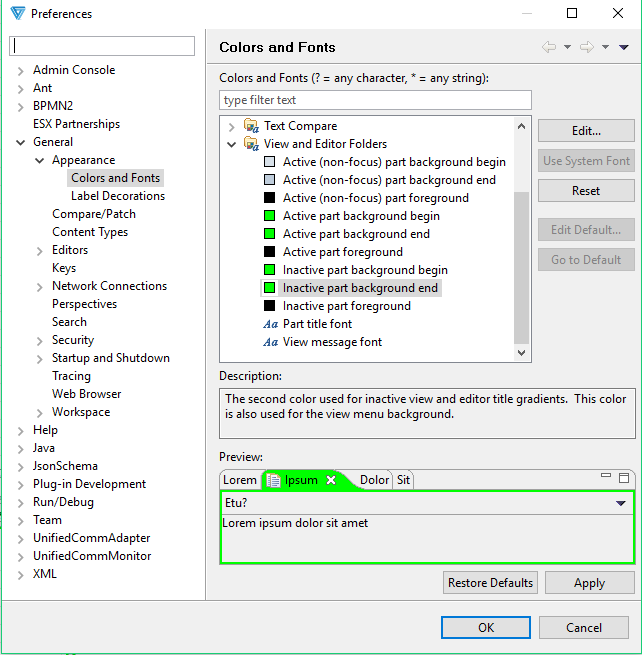
- Change the following to the color Green. Click OK. This will make all windows in the DEV Workspace green for clearer identification.
- Active part background begin
- Active part background end
- Inactive part background begin
- Inactive part background end
4. Navigate to the Admin Console Perspective in the CLARIFY 4 Studio. Connect to the DEV Server.
Configure your QA Workspace
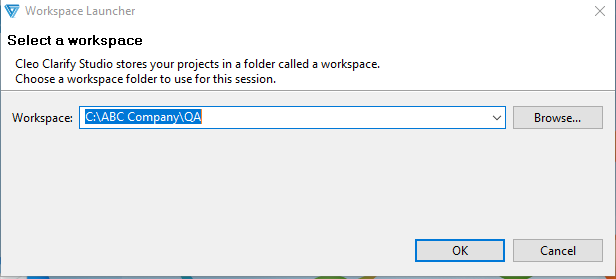
1. Open Clarify Studio and browse to the QA Workspace directory. Click OK.
2. In the CLARIFY 4 Studio, Select Window >>> Preferences. Browse to General >>> Appearance >>> Colors and Fonts. Then, Browse to View and Editor Folders.

3. Change the following to the color Yellow. Click OK. This will make all windows in the QA Workspace yellow for clearer identification.
- Active part background begin
- Active part background end
- Inactive part background begin
- Inactive part background end

Configure your PROD Workspace
1. Open Clarify Studio and browse to the PROD Workspace directory. Click OK.
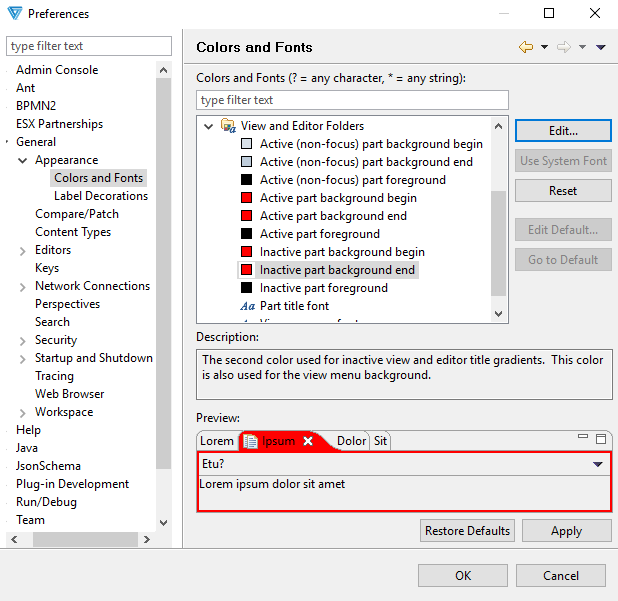
2. In the CLARIFY 4 Studio, Select Window >>> Preferences. Browse to General >>> Appearance >>> Colors and Fonts. Then, Browse to View and Editor Folders.

3. Change the following to the color Red. Click OK. This will make all windows in the PROD Workspace red for clearer identification.
- Active part background begin
- Active part background end
- Inactive part background begin
- Inactive part background end
4. Navigate to the Admin Console Perspective in the CLARIFY 4 Studio. Connect to the PROD Server.
Cleo - 4949 Harrison Ave Suite 200 Rockford, IL 61108
©2017 Cleo. All rights reserved.
3.
Comments
0 comments
Please sign in to leave a comment.